The site header is often the first impression visitors get, and it plays a crucial role in guiding them through your website with its menu. In today’s guide, I’ll show you how to create a sticky header using Elementor. This will ensure your header stays visible no matter how far users scroll, keeping navigation always within reach.
Let’s get started
Step 1: Create your menu 📝
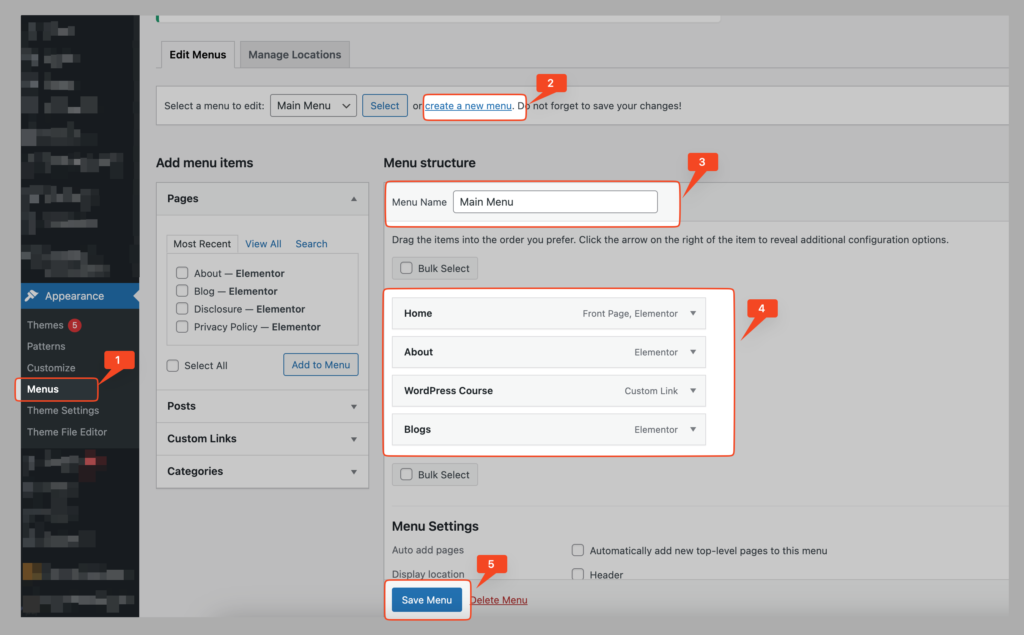
First you have to create a menu to showcase your pages in header. To create Main Menu go in you wp-admin > Appearance > Menus. Add the pages and post you want to show in your menu
Step 2: Create Header template from elementor 🖌️
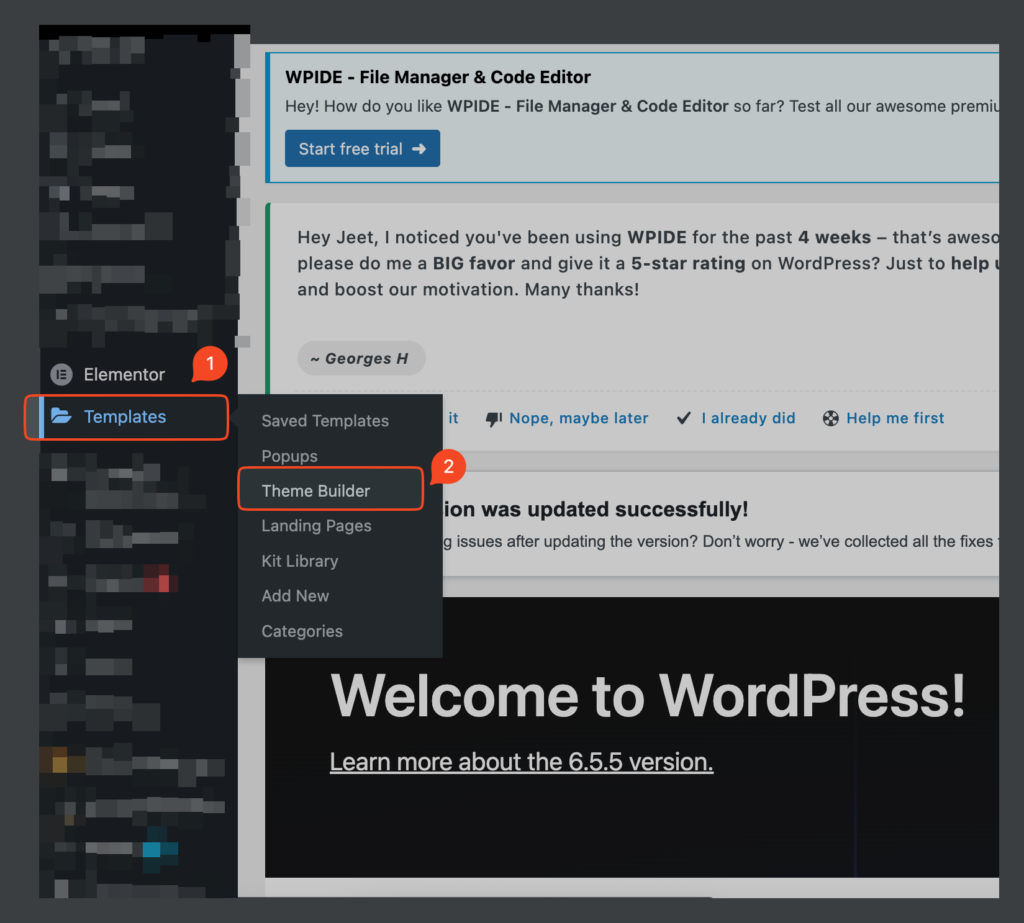
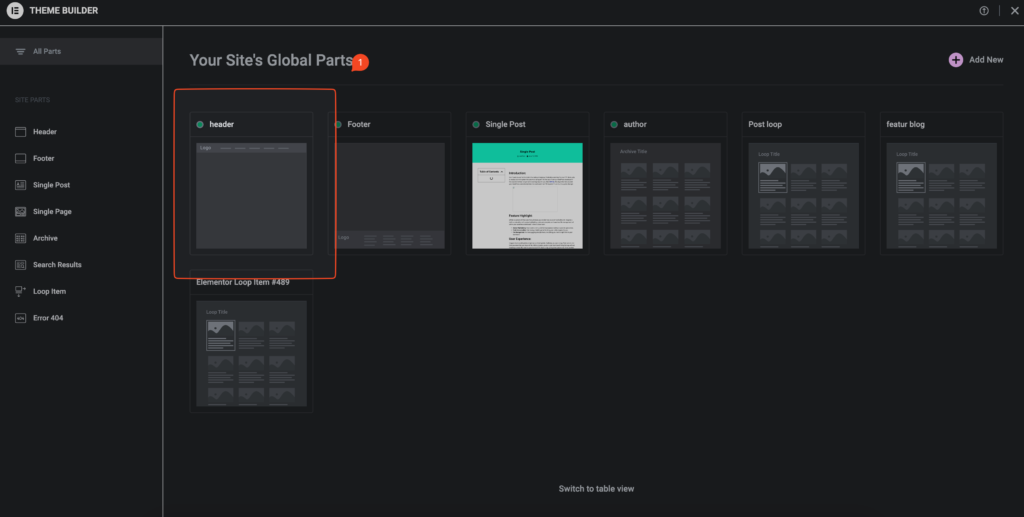
Now select header as a template and press add new to create new header template
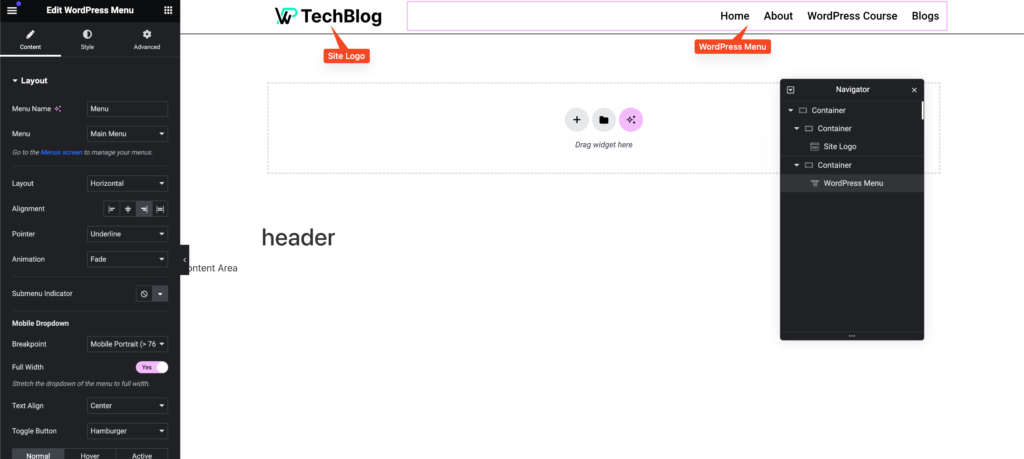
Once you done with create your header template add site logo and menu in a container shown in screenshot for your header, you can add more things too if you want.
Step 3: Create your header and add sticky effect 🚀
After creating the header select the container / section and go to Advance >> Motion Effects >> Sticky and select it as a Top or bottom whatever you prefer.
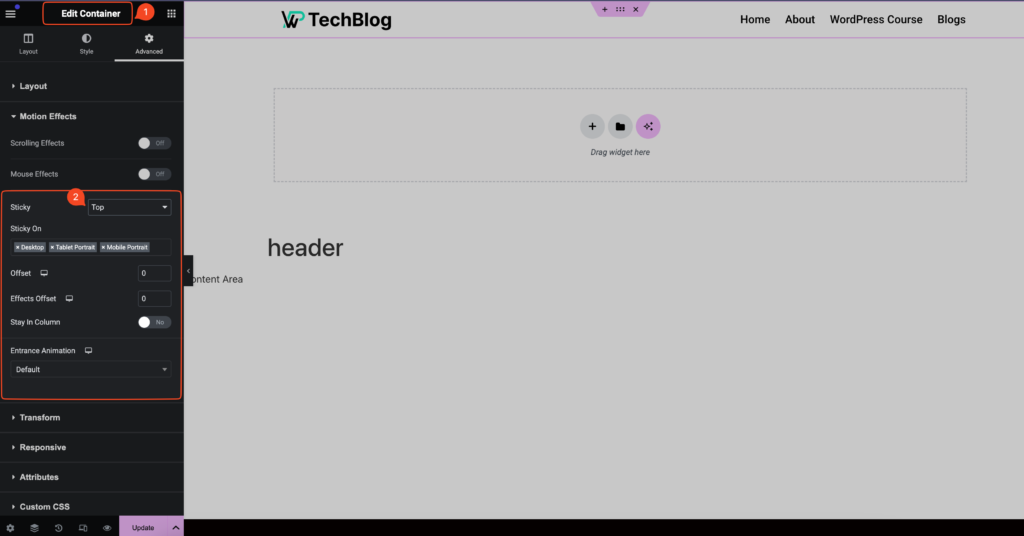
And done your sticky header is ready to rock on internet no hit the update button and check the header working in front and enjoy.
Overview, by following this steps you can easily create a stunning sticky header for your site you can also change some setting and add animation to your site header.

